At drinksworld.com, we’re all about crafting cocktails that look as amazing as they taste. And one of the best ways to wow your guests before they even take a sip is with a beautifully layered cocktail. Whether it’s a classic like the Tequila Sunrise or a fun, colorful shot, layered cocktails add that extra “wow” factor to your drink-making repertoire.
But let’s be real—layering cocktails can feel a little intimidating at first. It’s not just about tossing ingredients into a glass and hoping for the best. There’s a bit of science and technique behind it, and that’s exactly what we’re here to break down. By the end of this article, you’ll know how to layer drinks like a pro, turning your cocktails into Instagram-worthy works of art.
What Is a Layered Cocktail?
Let’s start with the basics. A layered cocktail, sometimes called a “pousse café” is one where ingredients are stacked on top of each other, creating distinct, colorful layers. The trick is getting those ingredients to stay separate rather than mixing into one homogenous blend. The result? A striking drink that looks like a piece of art—and when you take that first sip, the flavors unfold gradually as the layers blend together in your mouth.
The Science Behind Layering Cocktails
Alright, time to get a little nerdy for a second. The key to layering cocktails lies in understanding density. Every liquid has a different density, which is basically how heavy it is for its volume. When you layer a drink, you’re stacking the heaviest (most dense) liquid at the bottom and the lightest (least dense) liquid at the top.
Think of it like oil and water. Do you know how oil floats on top of water because it’s less dense? The same thing happens with your cocktail ingredients. The trick is to layer them gently, so they don’t mix together.
Specific Gravity
The term specific gravity refers to the relative density of a liquid compared to water. Alcohol, juices, syrups, and liqueurs all have different specific gravities, which is why they layer so beautifully—if done correctly. For instance, heavier ingredients like grenadine will sink, while lighter ones like whiskey or vodka float on top.
Understanding which liquids are denser helps you plan how to build your layers. But don’t worry—you don’t need to memorize the density of every liquid on your bar cart. A bit of trial and error goes a long way, and we’ll give you some helpful examples along the way.
Alcohol Content
The alcohol content also affects layering. Higher-proof alcohols tend to be lighter (because alcohol is less dense than water), so spirits like vodka and gin will typically float on top of heavier syrups or mixers.

Tools You’ll Need for Layering Cocktails
Before we start pouring, let’s make sure you’ve got the right tools on hand. You don’t need anything fancy, but these essentials will help you get those perfectly clean layers.
Bar Spoon
The most common tool for layering drinks is a good ol’ bar spoon. Its long, slender handle helps you pour liquids gently over the back of the spoon, slowing the pour and preventing the ingredients from mixing.
Pouring Control
If you’re serious about perfect layers, precision is key. Using pourers on your liquor bottles can help control the flow, or for even more control, you can use a pipette or syringe (yep, like the ones for baking or cocktail decorating) to layer delicate ingredients.
Chilled Glassware
Cold glassware can help keep your layers intact by reducing the movement of liquids as they settle. So, pop those glasses in the fridge or freezer before you start building your masterpiece. More about: How To Chill A Glass.
Step-by-Step Guide to Layering Cocktails
Now that you know what goes into a layered cocktail, let’s talk technique. Here’s a foolproof step-by-step guide for nailing those perfect layers:
Start with the Heaviest Ingredient
Always begin with the heaviest ingredient, typically something like grenadine, honey syrup, or any other sugary liqueur. Pour it directly into the glass and let it settle.
Use the Back of a Spoon
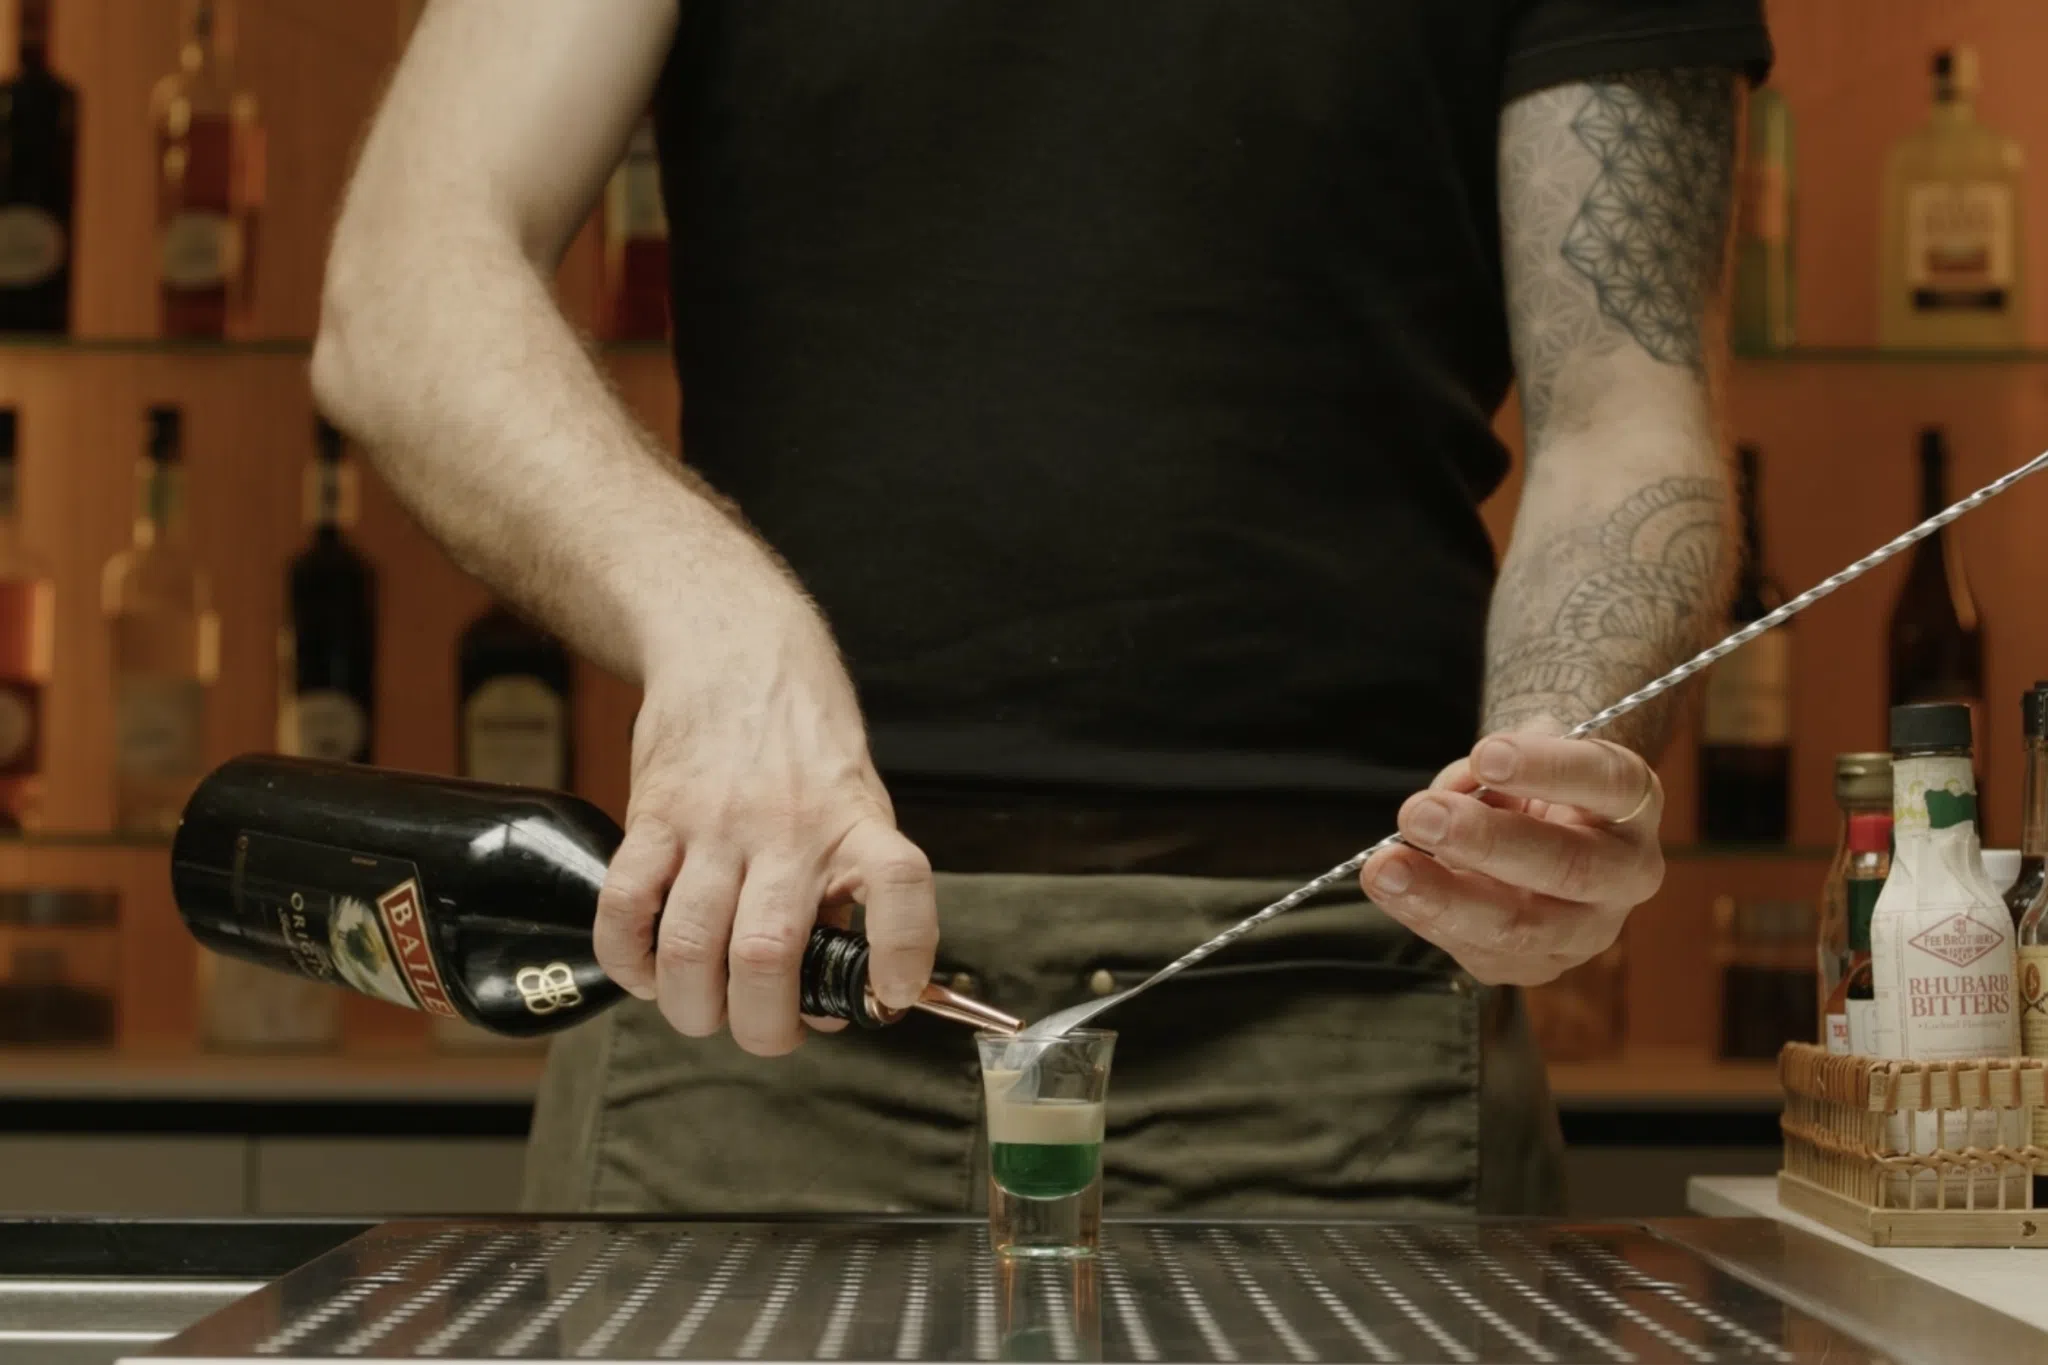
For the next layer, grab your bar spoon and hold it just above the surface of the liquid. Slowly pour the second ingredient over the back of the spoon (if pouring directly from a bottle, make sure to put a metal pourer on top first). This slows down the pour, allowing the liquid to gently rest on top of the first layer without mixing.
Pour Slowly and Steadily
Patience is key here. If you rush the pour, the liquids will mix, and you’ll lose that beautiful separation. Take your time to let the layers settle.
Repeat for Each Layer
Continue this process with each subsequent ingredient, working your way from the heaviest to the lightest liquid. Keep adjusting your technique based on the ingredients—if one layer seems too thick, slow down the next pour even more.
Pro Tip: If you’re layering with carbonated ingredients (like soda or sparkling wine), be extra gentle. Carbonation can cause the liquids to bubble and mix more easily.
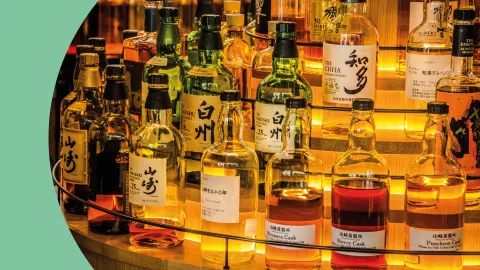
Common Ingredients for Layering
Not all liquids are created equal when it comes to layering. Here are some tried-and-true ingredients that will help you achieve those picture-perfect layers:
Heavy Syrups
- Grenadine: A classic for the bottom layer. Its rich red color and high sugar content make it sink beautifully.
- Honey Syrup: Dense and sweet, honey syrup adds both weight and flavor to layered cocktails.
- Maple Syrup: If you’re feeling adventurous, maple syrup makes for a rich, earthy bottom layer.
Liqueurs
- Kahlúa or Coffee Liqueur: Its coffee flavor and dense consistency make Kahlúa a go-to bottom or middle layer for many drinks.
- Baileys Irish Cream: Baileys is slightly lighter than Kahlúa, making it a perfect candidate for upper layers in cream-based cocktails (think of a B52 for example).
- Blue Curaçao: With its vibrant blue color and moderate density, Blue Curaçao creates striking layers.
Spirits
- Vodka: Light and neutral, vodka tends to float above denser liquids, making it great for the top layer.
- Gin: Similar to vodka, gin’s lightness makes it easy to layer on top.
- Rum: Depending on the type (dark, light, or spiced), rum can be either a middle or top-layer ingredient. Some rums are also highly flammable, perfect for when you want to add a dramatic flaming effect!
Juices and Mixers
- Orange Juice: The fresh, bright flavor of orange juice pairs well with grenadine, and its moderate density works in mid-level layers.
- Pineapple Juice: Another great option for tropical cocktails, pineapple juice has just enough heft to sit under lighter spirits.
- Cranberry Juice: With a bold color and medium weight, cranberry juice can either sit on top of syrups or be sandwiched between heavier and lighter ingredients.
Popular Layered Cocktails and How to Make Them
Let’s take a look at a few classic layered cocktails and break down how to make them.

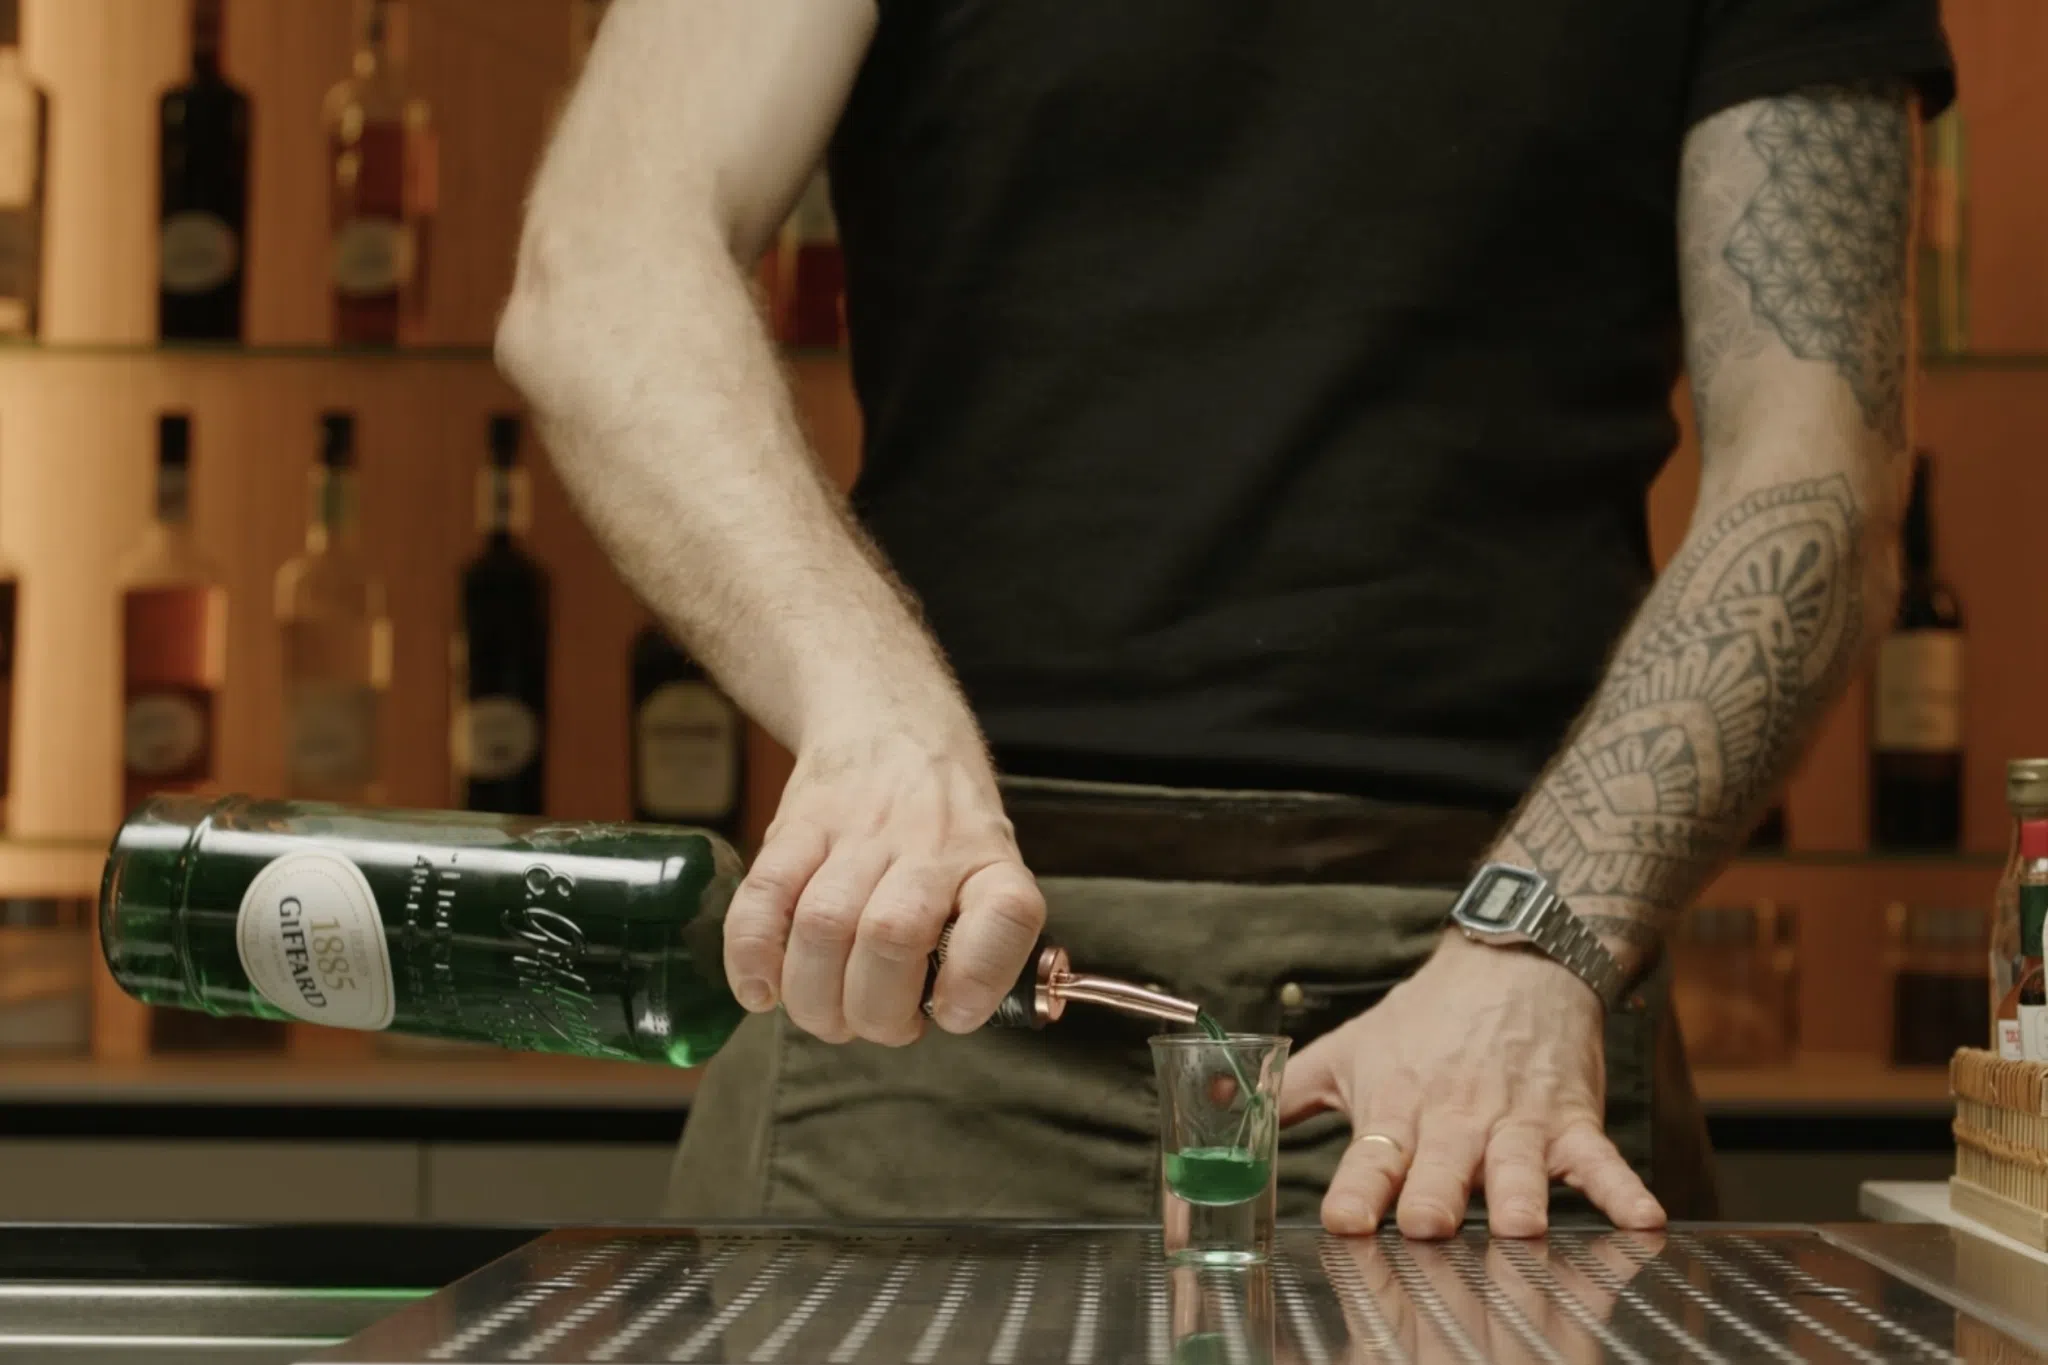
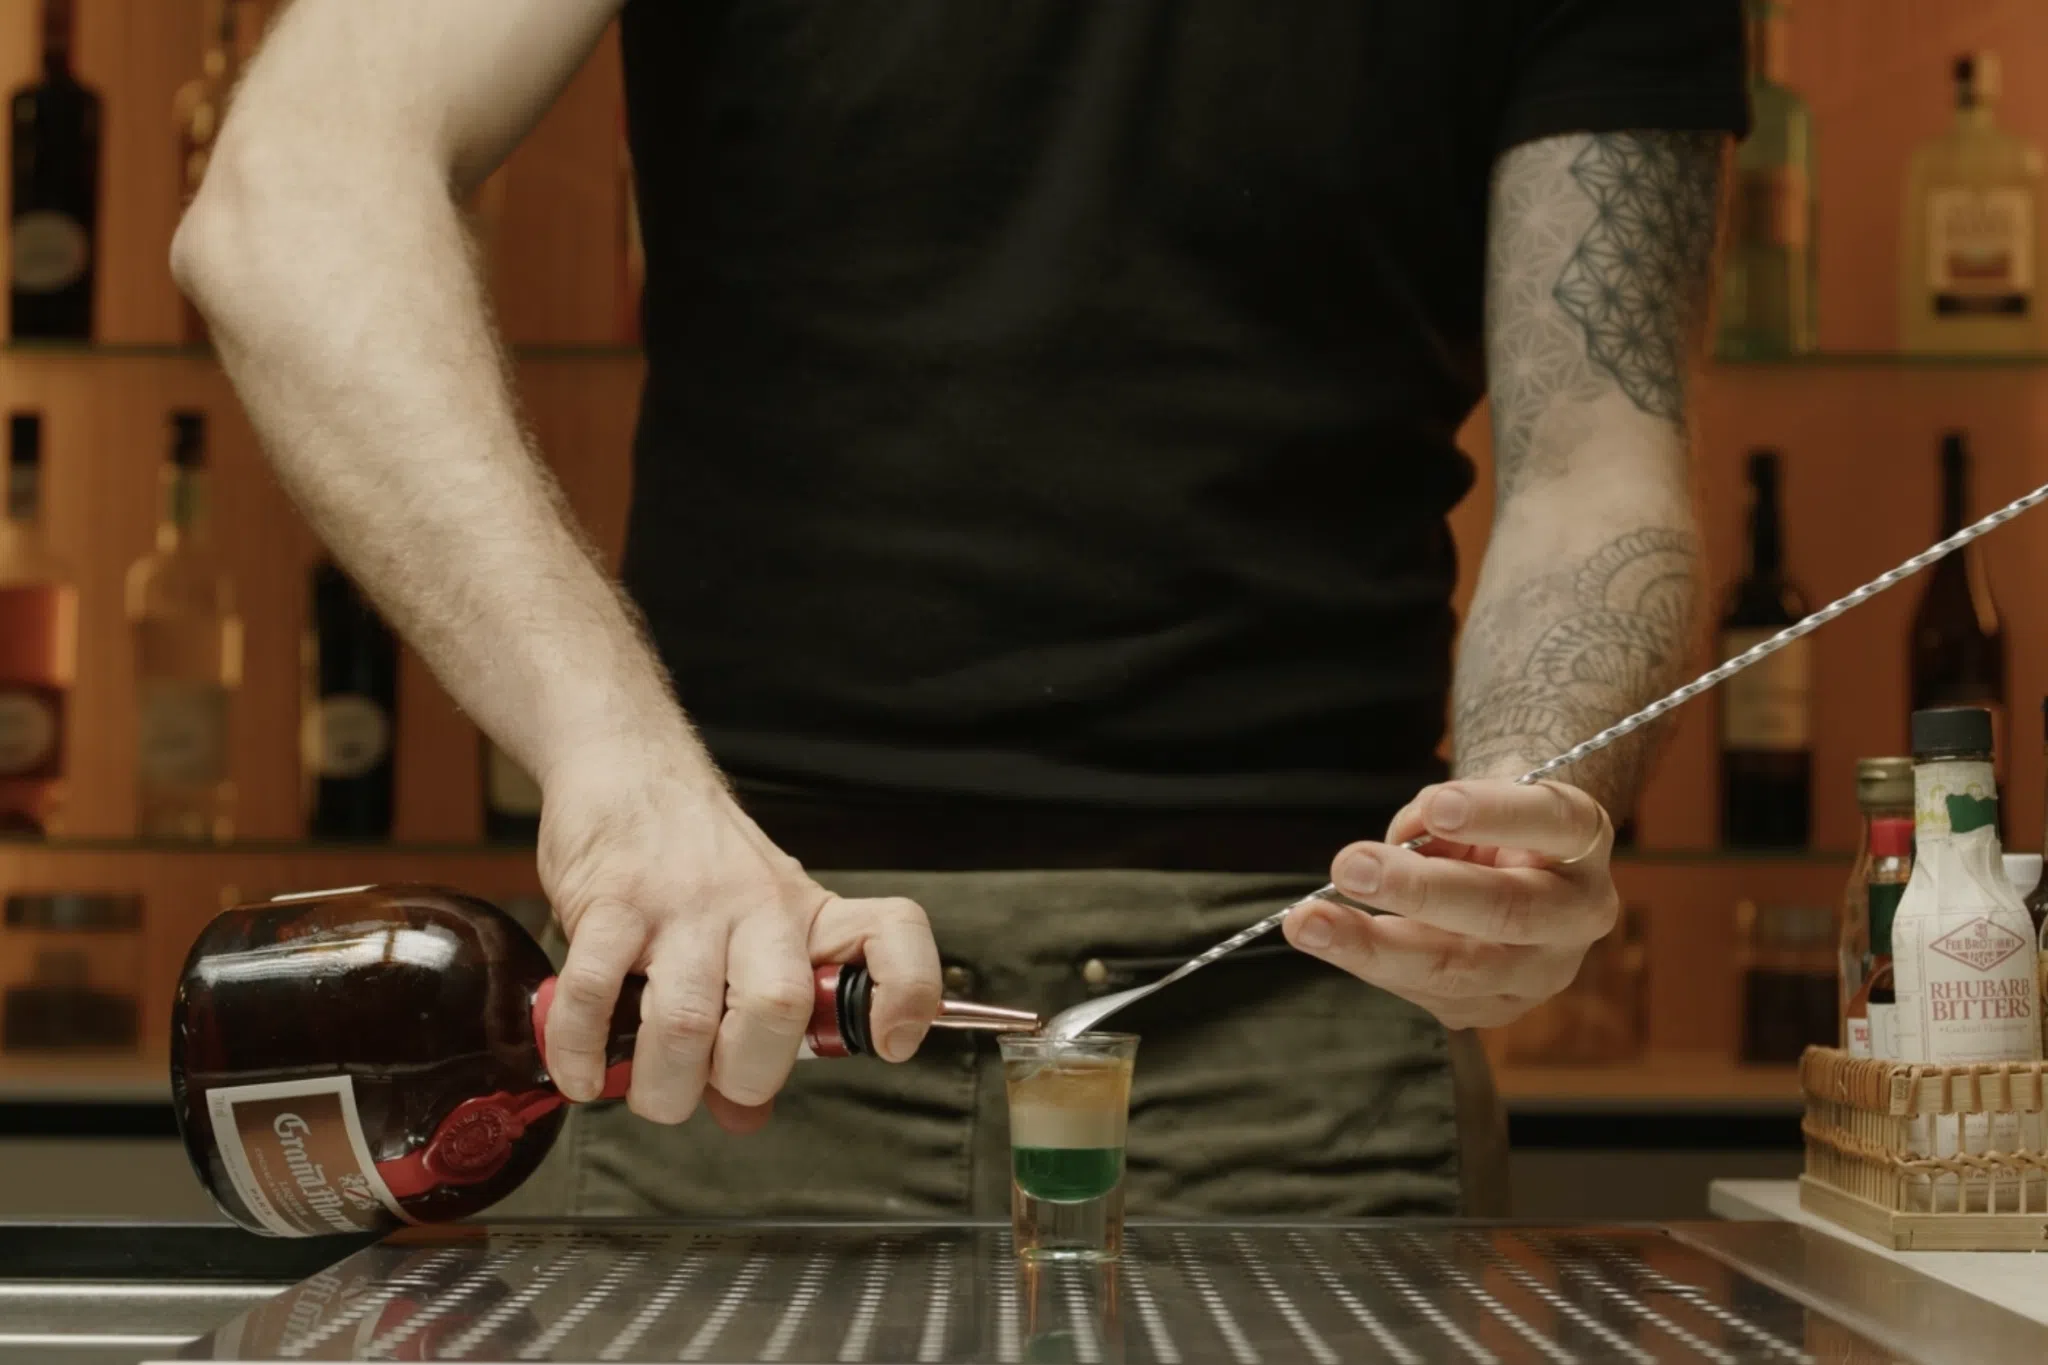
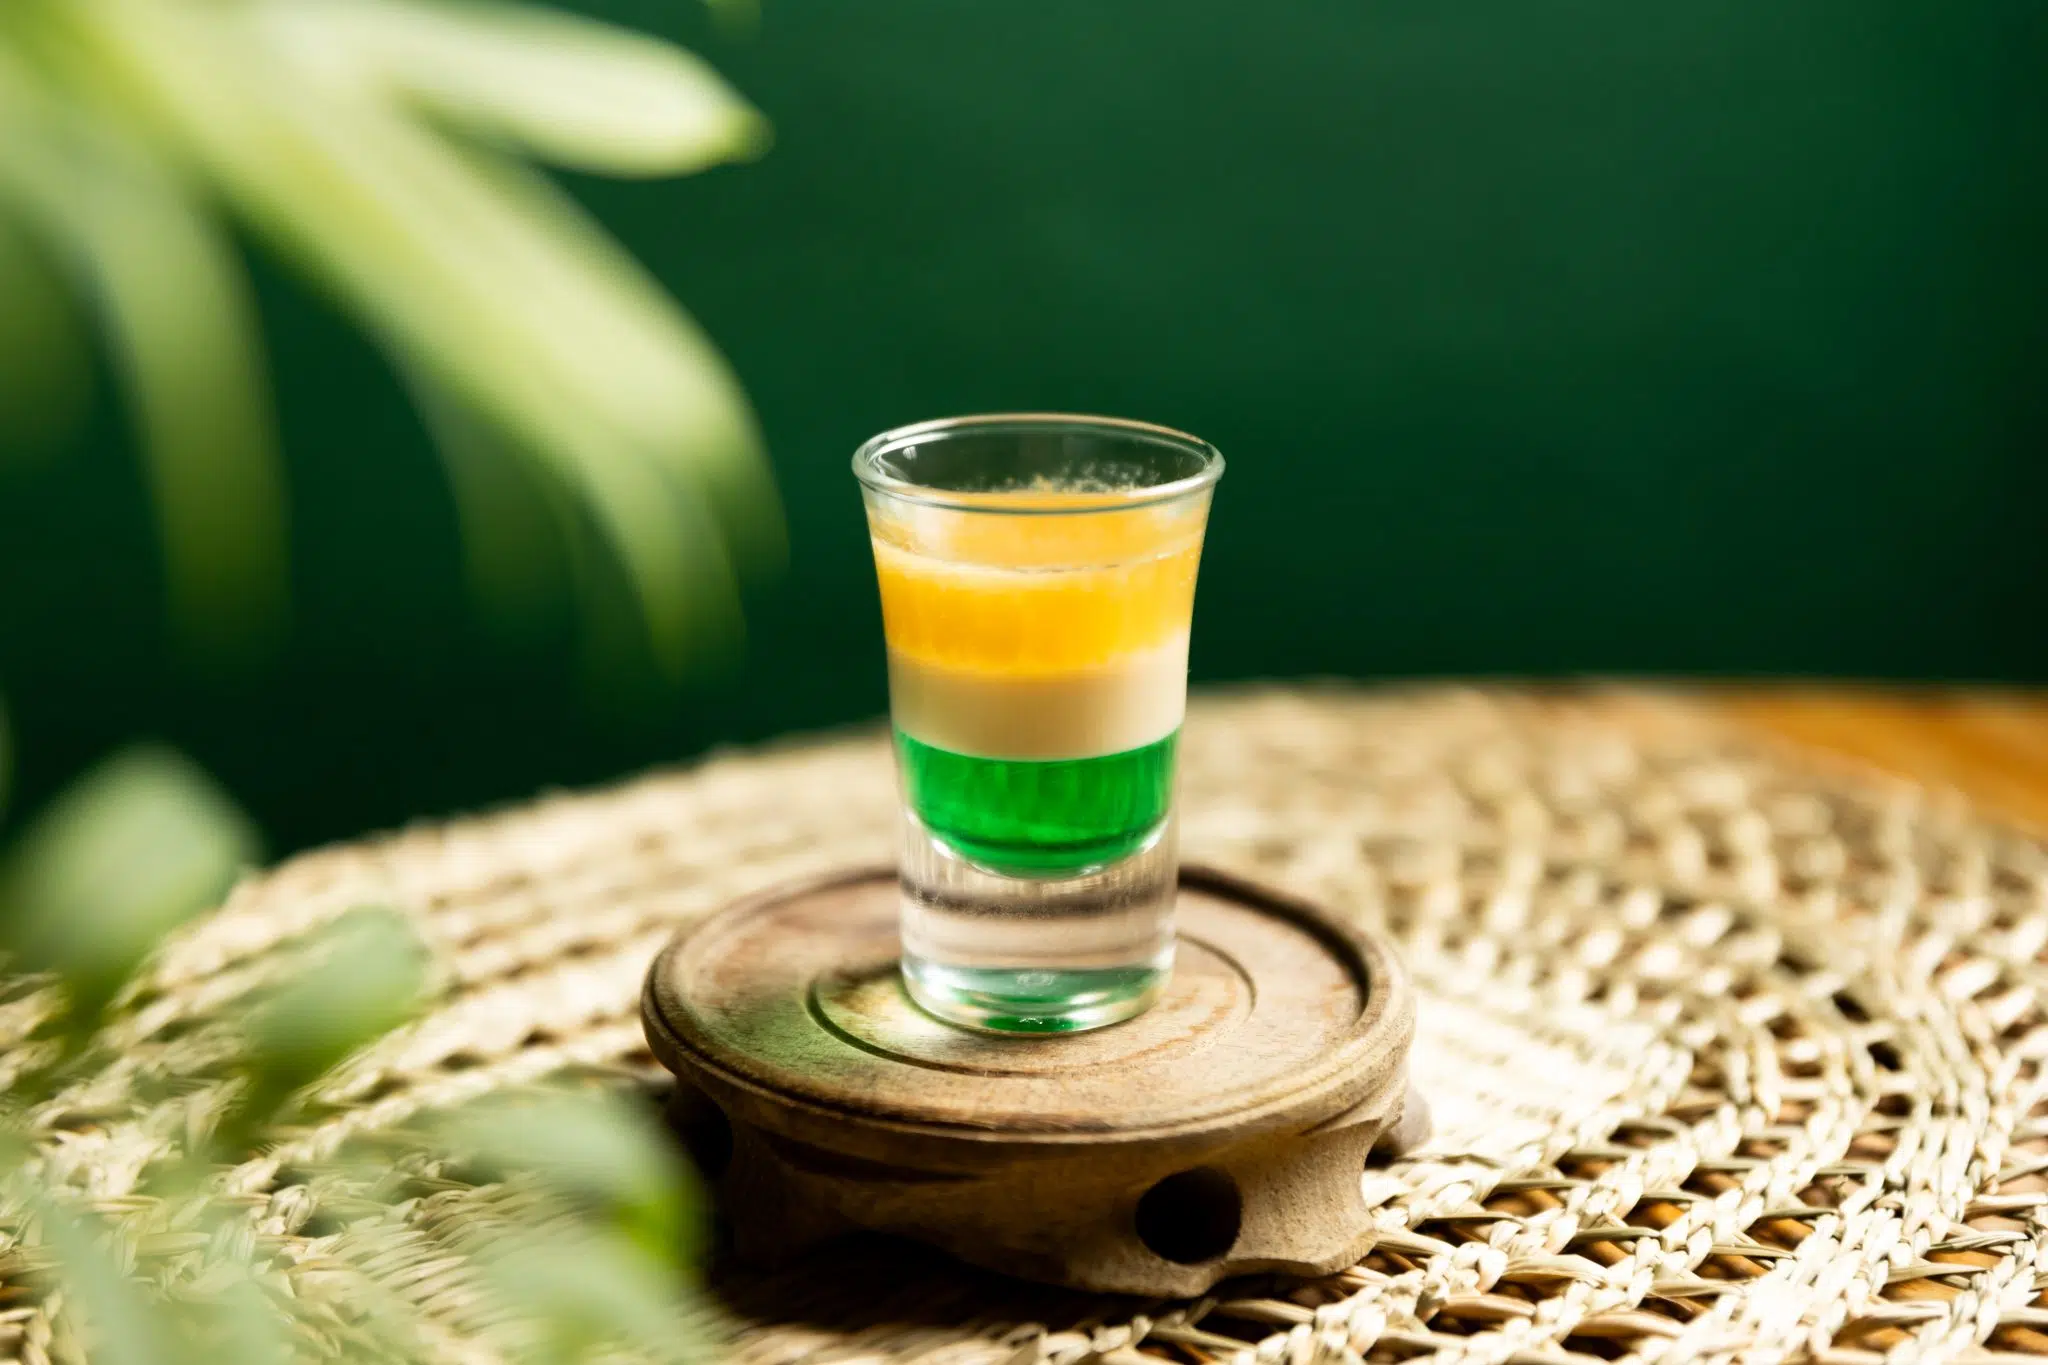
This classic shot layers Kahlúa, Baileys, and Grand Marnier. Here’s how you do it:
- Pour the Kahlúa into a shot glass (⅓ of the glass).
- Gently layer Baileys on top of the Kahlúa using the back of a spoon. Make sure that all the ingredients are in equal parts (so ⅓ of the glass as well).
- Rinse the spoon, dry it, and repeat with Grand Marnier for a perfectly layered shot.
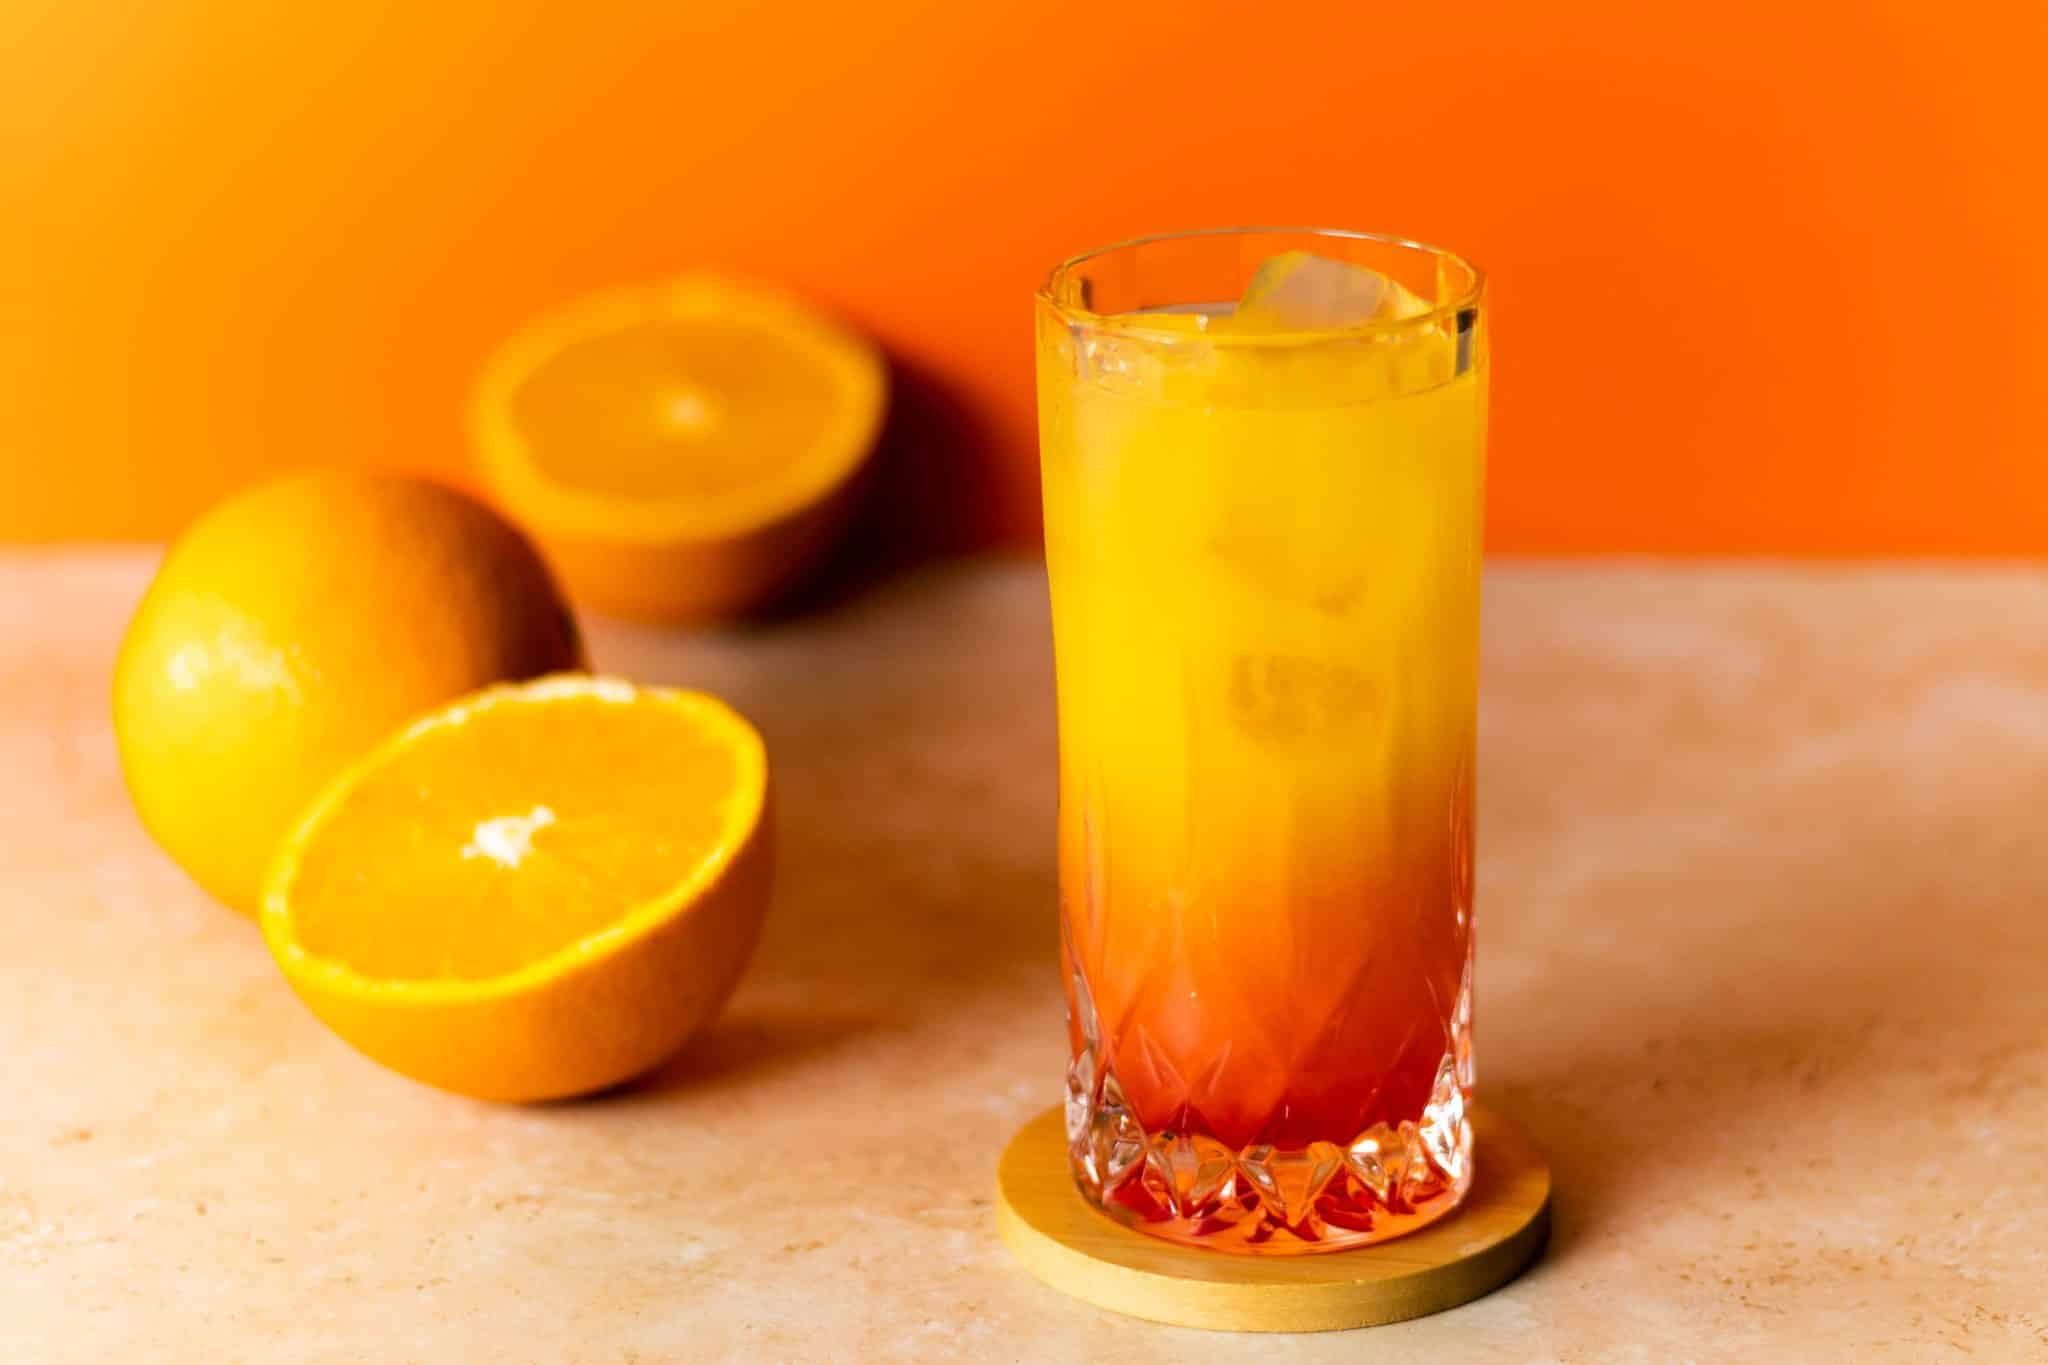
This cocktail is a crowd-pleaser and a layering classic:
- Fill a highball glass with a generous amount of ice cubes.
- Fill the glass up to ⅔ with orange juice.
- Place a bar spoon in the glass, making sure that it touches the bottom of the glass. Then, slowly pour the grenadine alongside the spoon: it will sink at the bottom of the glass and create a nice scarlet layer.
- Gently remove the spoon, add a straw, and float the tequila on top of the orange juice. Due to tequila’s high alcohol content, it is not necessary to use a bar spoon to create this layer.

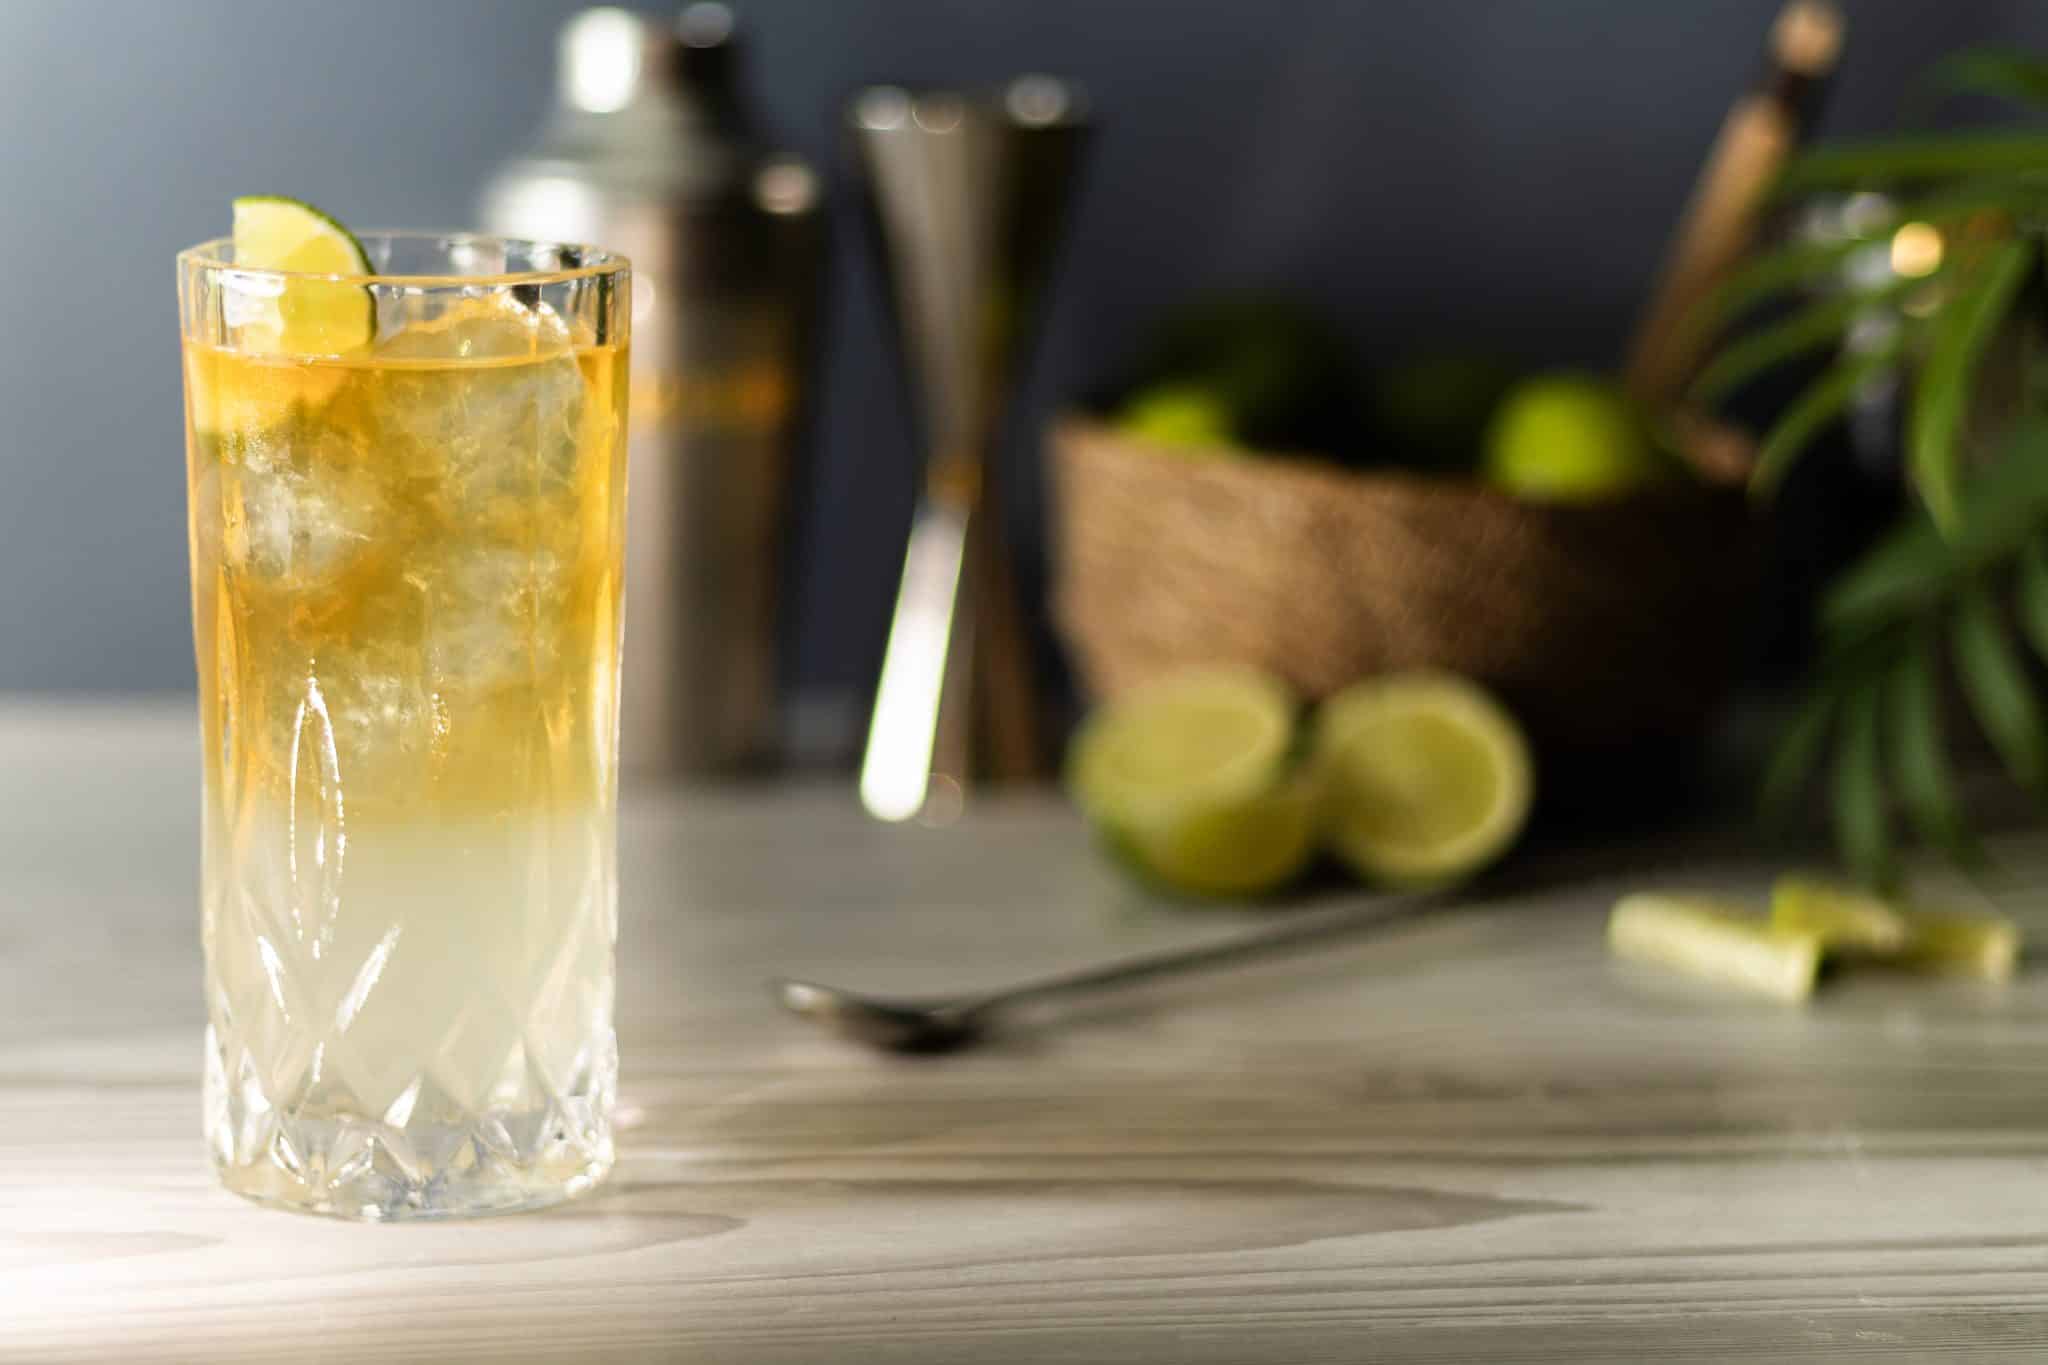
This classic long drink is also easy to layer:
- In a cocktail shaker, pour ½ ounce of silver tequila, light rum, gin, vodka, Triple Sec, and simple syrup. Add ¾ of fresh lemon juice, fill the shaker with ice, and give it a good shake. Use a cocktail strainer to remove the ice and transfer the drink into the other tin of the shaker
- Prepare a highball glass with ice cubes and fill it to its half with cola. Add a straw.
- It’s now time to layer: using a bar spoon, gently pour the shaken mixture on top of the cola. Due to the bubbles on the cola and the alcoholic content of the mix in the shaker, the layer should form quite easily.
- Garnish with a lemon wedge or zest, and enjoy!

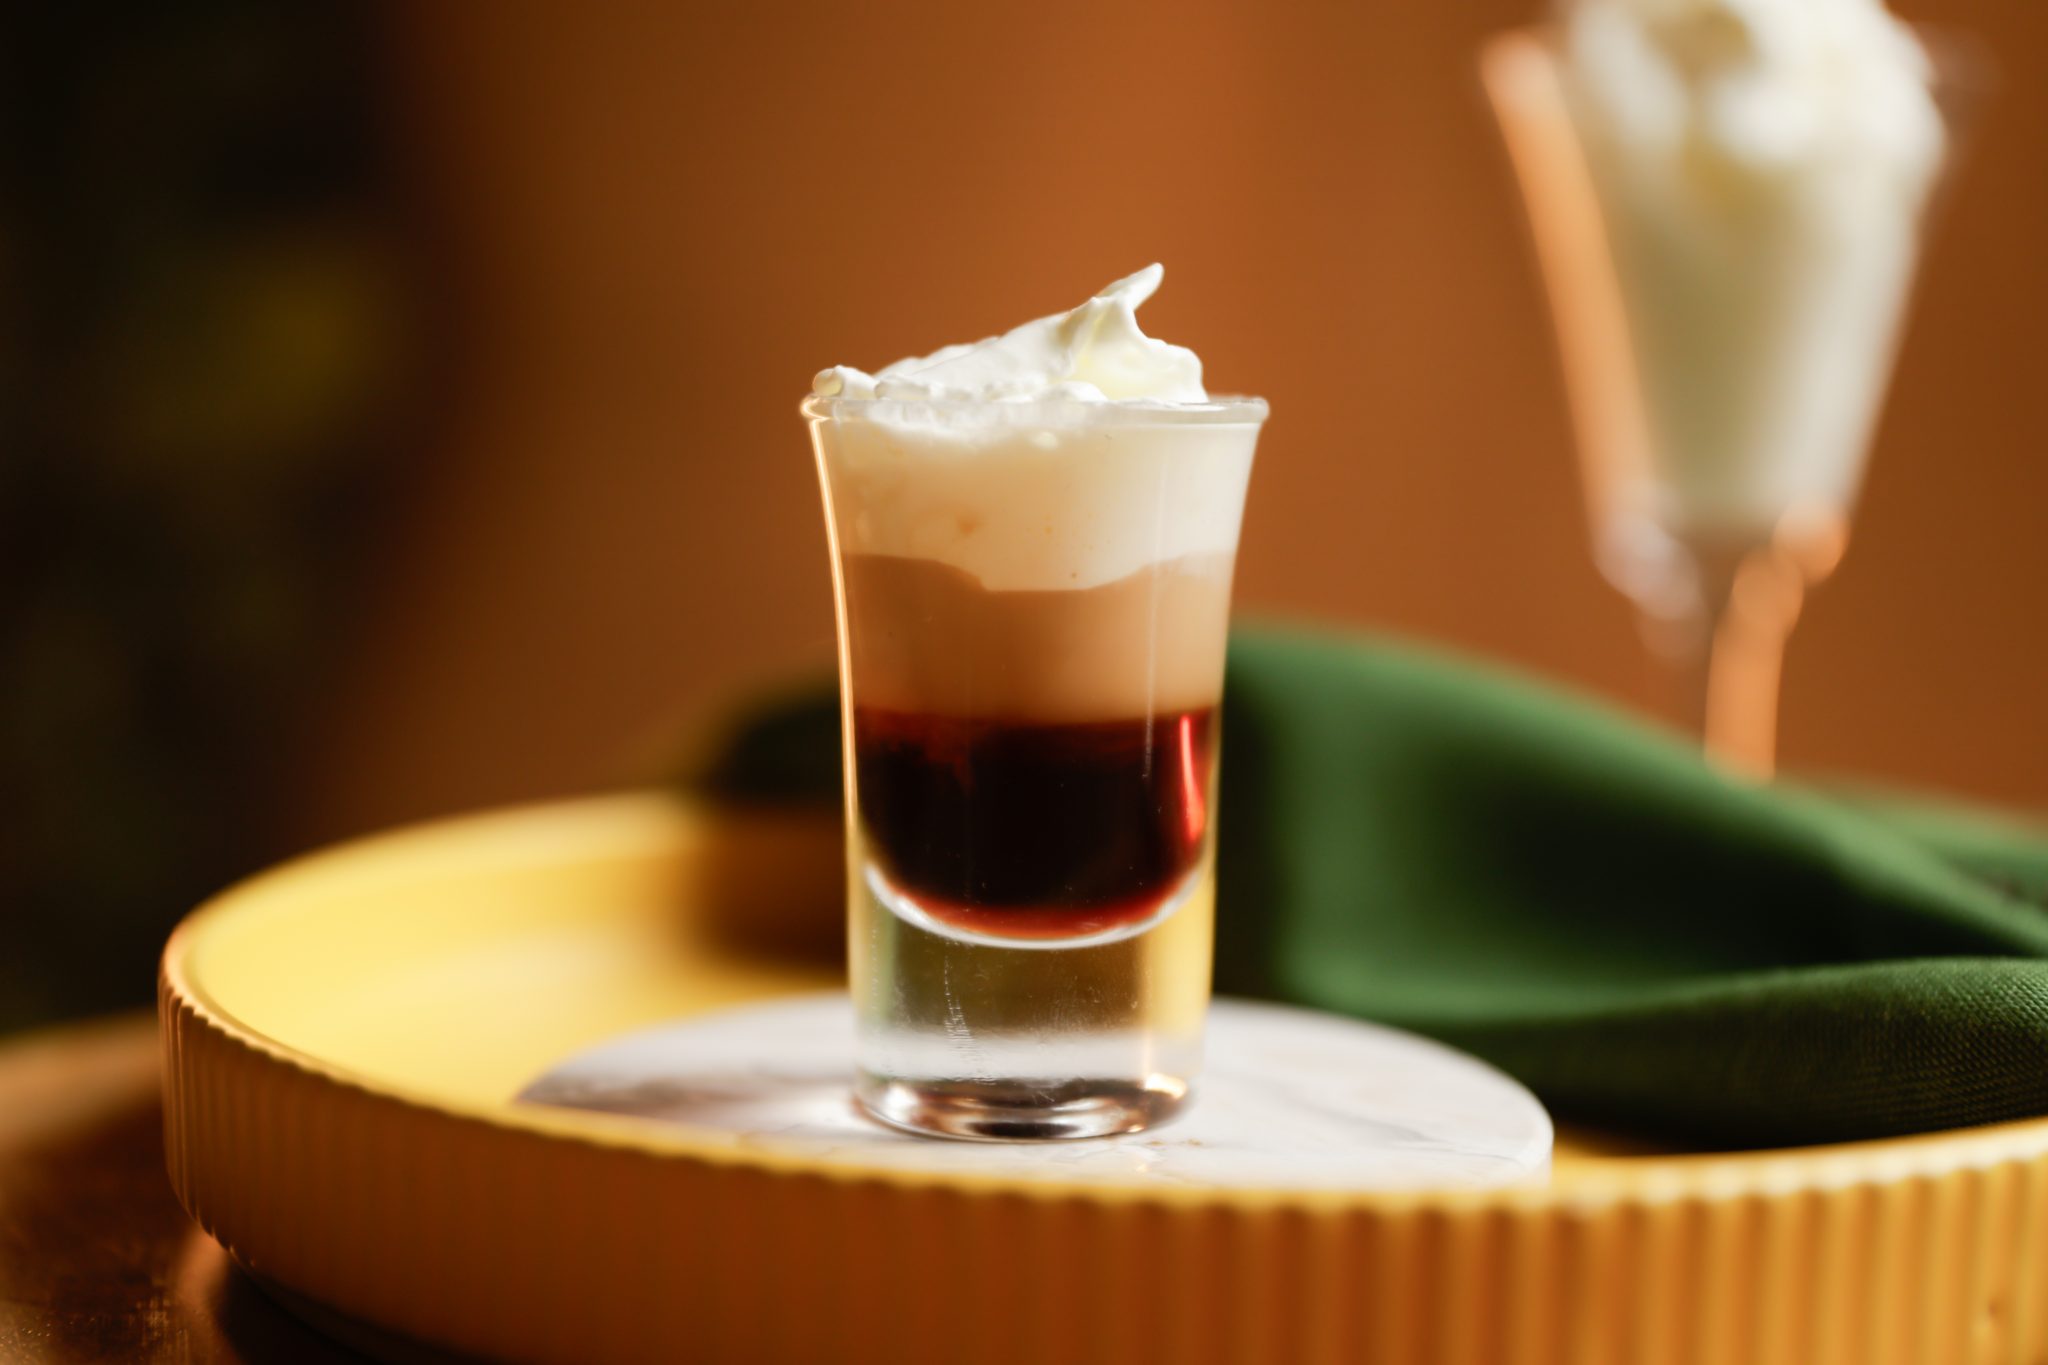
This Swedish classic makes for a perfect after-dinner drink and will delight coffee amateurs:
- Fill a shot glass with hot water and let it rest for a few minutes.
- Once the shot glass has warmed up, discard the water inside. Fill your shot glass up to ⅓ with Galliano Vanilla (or other vanilla liqueur is not available).
- Using a bar spoon, slowly pour a hot espresso over the layer of Galliano. It will form a distinct, dark brow layer that should be roughly equivalent to ⅓ of the glass too.
- Using the same technique, layer 1 part of heavy cream or half-and-half on top of the coffee. This layer should be roughly the same size as the other two and rise to the top of the glass. Serve immediately, and enjoy while still hot!
Advanced Techniques for Layering Cocktails
Once you’ve mastered the basics, it’s time to up your game with some advanced techniques:
Creating Smooth Transitions
If you want to blur the lines between your layers for a gradient effect, use a bar spoon to stir very lightly where two layers meet. This works especially well with juices and spirits.
Combining Colors
Layering drinks with vibrant and contrasting colors creates a visually stunning drink. Think red grenadine, blue curaçao, and golden tequila for a rainbow-like effect.
Textured Layers
For an even more impressive presentation, try incorporating layers with different textures. A cream-based liqueur like Baileys can sit beautifully atop a fruity or syrupy layer, adding a velvety texture.
Troubleshooting Layering Issues
Even the best of us run into problems when layering cocktails. Here’s how to fix common layering fails:
Why Layers Mix
If your layers are blending together, it’s usually because the density difference isn’t big enough or you’re pouring too fast. Try slowing down your pour, or choose ingredients with more contrasting densities.
Preventing Overpouring
One heavy-handed pour can ruin the whole thing. Use a pipette or pour over the back of the spoon very slowly to keep things neat.
Pro Tip: If you are using metal pourers on top of your bottles, use your thumb to slightly block the little hole on top of the pourer: this will block the air suction inside and slow down the flow of liquid.
Layering Fails
Sometimes, despite our best efforts, layers can get muddled. If that happens, give it a stir and call it a day—or take it as an opportunity to experiment with flavor combinations!
Conclusion
Layering cocktails is both an art and a science. Once you get the hang of it, it’s an easy way to elevate your drinks and impress anyone lucky enough to have a sip. At drinksworld.com, we’re all about encouraging creativity and pushing the boundaries of what cocktails can be—and layered drinks are a perfect way to show off your skills.
So, grab your bar spoon, line up your ingredients, and start practicing those layers. Trust us, with a little patience, you’ll be crafting show-stopping cocktails in no time. Cheers to perfectly layered drinks!