The whipping siphon—a tool that brings culinary and cocktail magic wherever it goes. I was blown away the first time I saw one in action: foams appeared, flavors deepened, and infusions happened in minutes instead of hours.

Here’s everything you need to know about using a whipping siphon, from safety tips to crafting foams, sodas, and even rapid infusions.
Safety First: Essential Precautions
Before diving into the fun, it’s crucial to remember some safety guidelines:
- Follow Capacity Limits: Never exceed the siphon’s maximum fill line.
- Use the Right Number of Cartridges: Stick to the instructions in your manual or recipe for the recommended number of gas cartridges.
- De-Gas Before Opening: Always ensure the siphon is empty of gas before opening it. Release the gas by pulling the trigger until no more pressure remains.
- Always Check the Parts: Regularly check the parts of your siphon to make sure they are free of any default. Change them as soon as you notice something broken or about to break, and DO NOT use pieces from different manufacturers on one siphon. Always buy spare parts from the same brand of your siphon to ensure they are compatible and won’t result in a safety hazard.
- Clean Thoroughly After Use: This is true for any kitchen appliance, but even more for a siphon in which you have used a dairy or egg-based preparation. Use warm water and soap on a bottle brush to clean the inside well, and don’t forget to disassemble the top part of the siphon (remove the seal and unscrew the tip) to clean. Dry it well and store with the lid off when not in use.
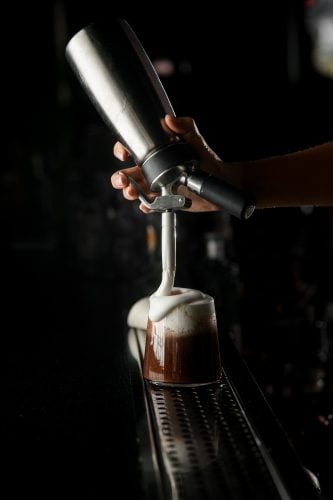
How to Make Foam with a Whipping Siphon
Foams add an impressive, flavorful touch to drinks and dishes. Using a whipping siphon, you can create foams from nearly any liquid, from fruit juices to chocolate to herbal infusions. To make a stable foam, you will need a protein or solidifying base such as egg whites, aquafaba (chickpea water), agar-agar, or xanthan gum.
Steps to Make Foam:
- Prepare the Mixture: Combine your chosen liquid and stabilizer (e.g., egg whites or xanthan gum) in a mixing bowl.
- Fill the Siphon: Pour the mixture into the siphon, ensuring you don’t exceed the maximum fill line. Close the siphon well, making sure the seal in the top part is well in place (most manufacturers use a red, round-shaped seal).
- Charge with N₂O: Attach a nitrous oxide (N₂O) cartridge to the siphon, as N₂O is ideal for creating foams. For bigger siphons, you may need to use 2 cartridges. However, always check the instructions on the siphon and never use more cartridges than advised.
- Shake Well: Give the siphon a good shake for 20-30 seconds. This will ensure an equal distribution of both liquid and gas through the siphon.
- Chill: For better results, place the siphon in the refrigerator for at least an hour before use. To further enhance foam stability, chill the siphon without the lid in the freezer for 30 minutes to 1 hour before adding the mixture.
- Dispense the Foam: Give the siphon a shake before using. Then, hold the siphon upright and gently press the trigger to release the foam onto your drink or dish. Clean the tip under running water, pat it dry and store it upright after use.
Pro tips:
- Start with simple recipes and go from there. For your first trials, stick to a simple recipe: use a stabilizer, a main liquid ingredient and a flavoring (optional). For instance, this could be an egg-white-based foam, flavored with cold Earl Grey tea and a touch of vanilla syrup. Once you have the hang of it, you’ll be able to experiment with more ingredients & ideas without risks!
- Filter your mixture: whatever you decide to use, always make sure there are no particles in suspension in the mixture as they can clog the siphon when dispensing the foam.
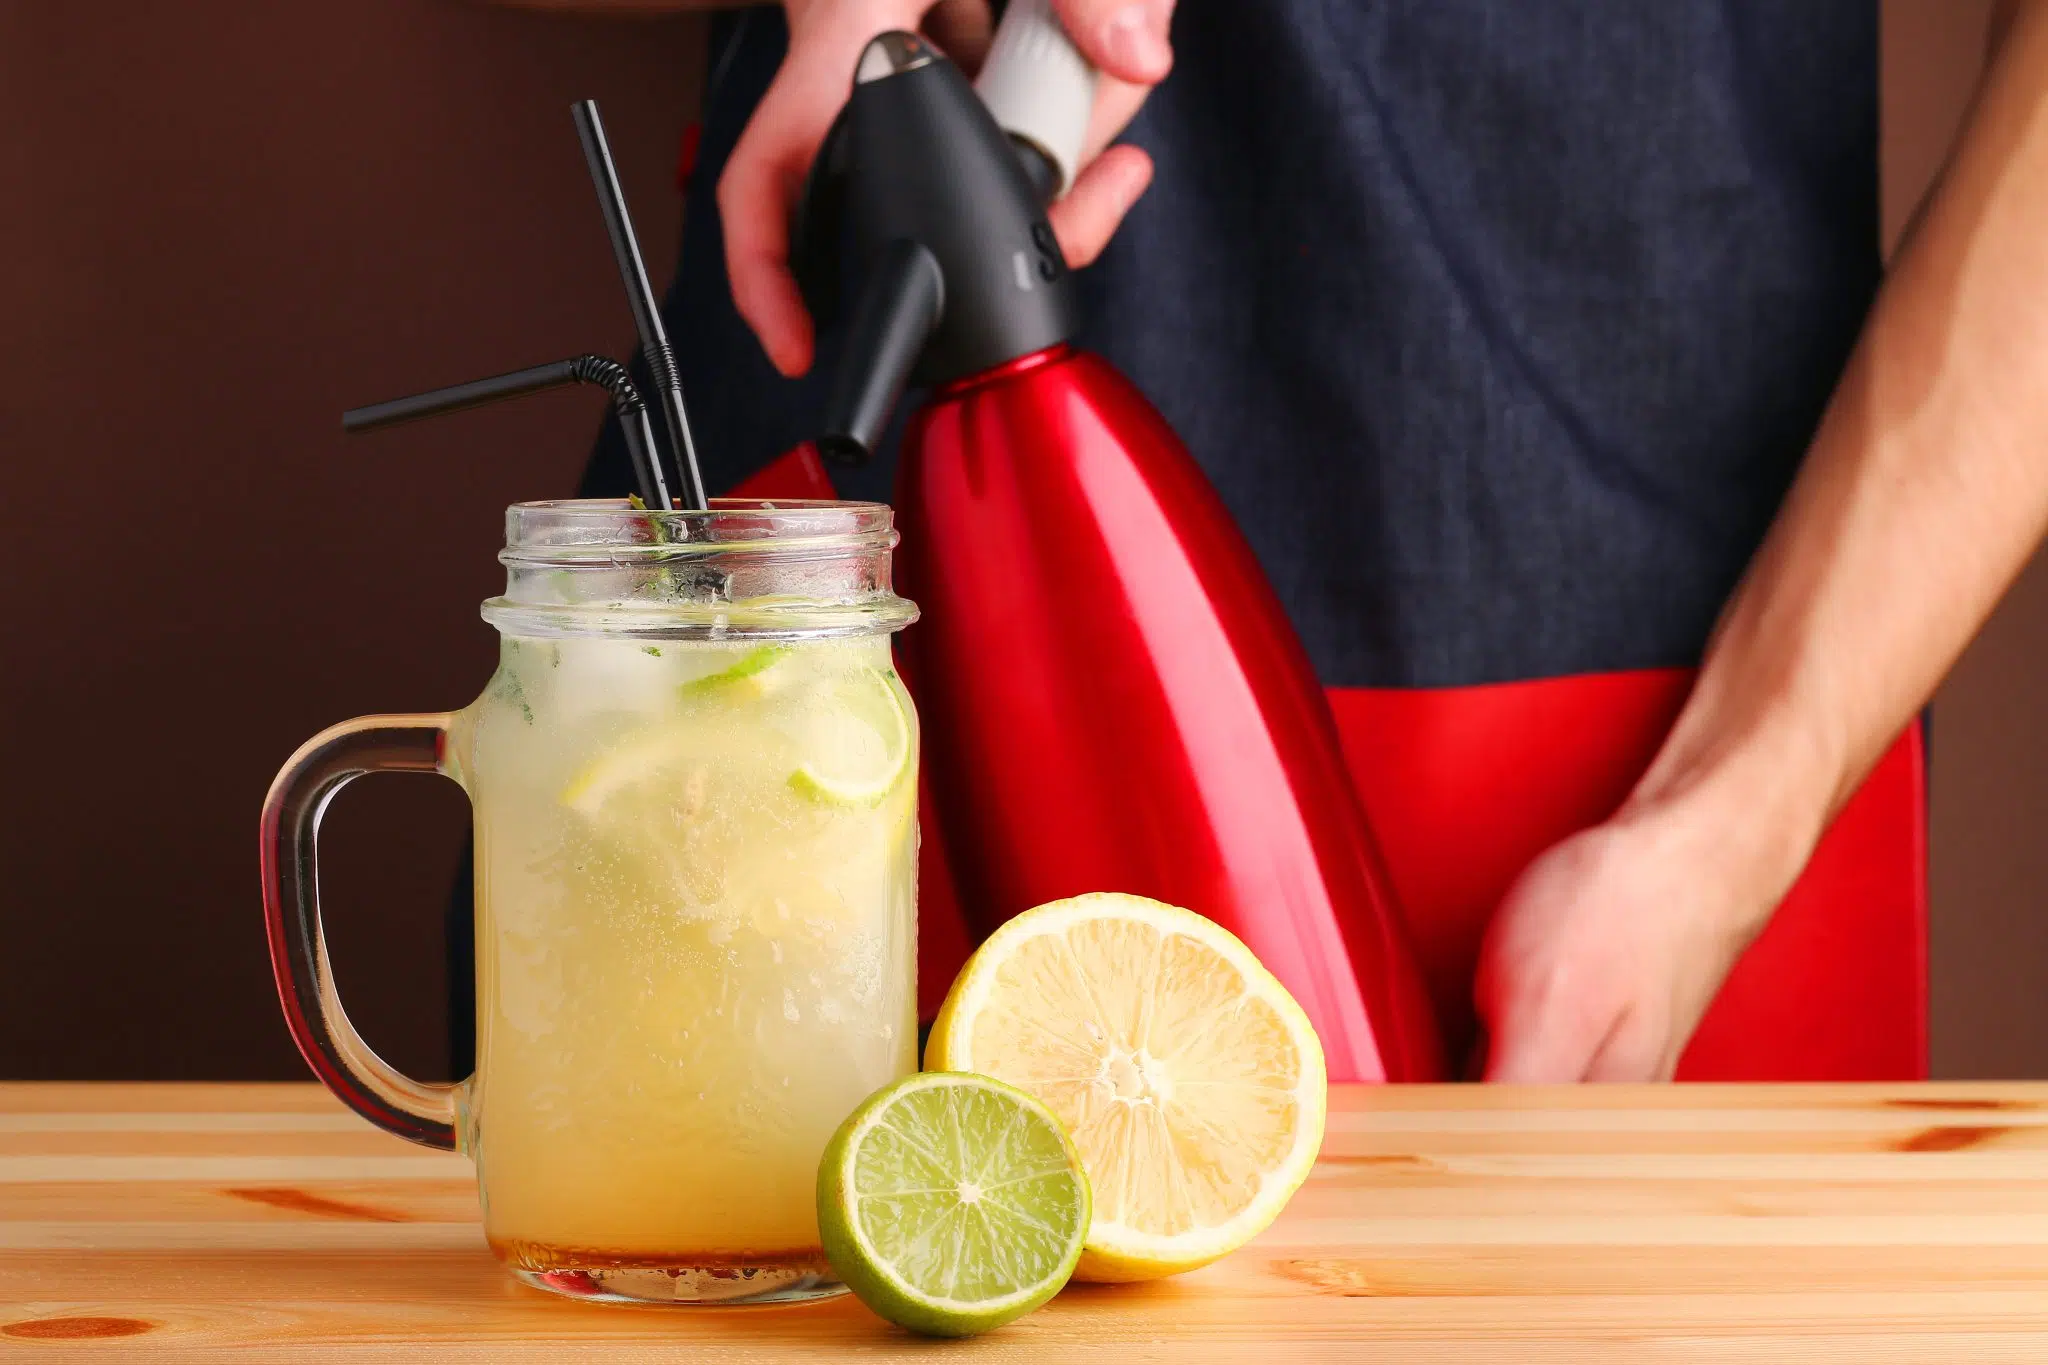
How to Use a Whipping Siphon for Soda
Did you know your whipping siphon can double as a soda maker? You can carbonate almost any liquid with the right technique and a CO₂ cartridge. Here’s how to get a refreshing, bubbly drink using your siphon.
Steps to Make Soda:
- Fill with Liquid: Pour your chosen liquid into the siphon, making sure not to exceed the fill line.
- Charge with CO₂: Attach a CO₂ cartridge to the siphon and give it a gentle shake for about 10-15 seconds to distribute the gas through the siphon.
- Chill: Place the siphon in the refrigerator to allow the liquid to absorb the CO₂. Let it sit for 30 min.
- Release Excess Gas: Once chilled, set the siphon upright on a flat surface and press the trigger to release any excess gas. Make sure the room is ventilated or do it under a kitchen hood.
- Serve: Once all the gas has been purged from the siphon, open it by unscrewing the top part. Pour the soda directly from the siphon. After each use, reseal and store the siphon in the fridge to maintain carbonation.
Note: If your soda isn’t as bubbly as you’d like, repeat steps 2 to 5 with an additional CO₂ cartridge to increase carbonation.
How to Make Rapid Infusions with a Whipping Siphon
The whipping siphon’s pressurization can quickly infuse flavors that would normally take hours or days. This technique is fantastic for creating flavored spirits, such as homemade bitters or tincture, or to infuse fragile ingredients into syrups or any other preparation.
Steps to Make Rapid Infusions:
- Add Ingredients: Roughly chop your flavoring ingredient (e.g., herbs, spices, fruits)). Place it into the siphon along with the spirit you want to infuse.
- Charge the Siphon: Attach a N₂O cartridge to create a high-pressure environment, which extracts flavors rapidly. If your recipe calls for it, add a second cartridge.
- Shake and Wait: Give the siphon a few gentle shakes, then let it sit for 1 to 5 minutes depending on the recipe. As you can see, therapid infusion is indeed fast: respect the time indicated on the recipe or, if creating your own, make sure to time properly and take notes so you can adjust the infusion time on your next trial if needed.
- Release Pressure: Put the siphon upright on a flat surface, hold a glass of plastic container on top of the tip and release the pressure by pulling the trigger. You want to remove all the gas from the siphon as quickly as possible, so make sure to squeeze the trigger all the way. It will make some noise, that is totally normal!
- Open and Strain: Open the siphon, and listen: you should hear some bubbles still fizzing. That means there is still some gas and the liquid, and that the infusion is still processing. Wait until the bubbling sound dies out, and then strain the mixture through a fine mesh strainer before bottling and labeling properly.
Pro tips:
- Same as for the foam, make sure to avoid having small solid particles in your liquid (only chop your flavoring ingredients roughly). When venting the siphon to release the pressure, hold it upright and perfectly still to prevent any solid from flying out and risk clogging the siphon.
- Use ingredients at room-temperature as heat and cold can have an influence on the flavor extraction.
- If you own an iSi siphon, the brand is now selling special attachments for its whippers to make the infusion process easier (insert link to a picture?) and designed to address the problem of the whipper getting clogged while venting. In any case, the overall technique remains the same whether you use these attachments or just a regular whipper.
- For more information and details on this technique, make sure to read the dedicated chapter in Dave Arnold’s Liquid Intelligence, which includes a lot of technical specifications to make the perfect infusion as well as some recipes to try.
Conclusion
A whipping siphon is an incredibly versatile tool that can enhance your culinary and cocktail creations in endless ways, from foams and sodas to infusions. So don’t be afraid to experiment and make the most of your siphon—you may be surprised by the flavors and textures you can achieve!